Thursday, June 12, 2014

Dresser Lace 2

 
As I have mentioned before, I have other lace passions other than tatting.  They are the needlelaces of:  Carricmacross, Teneriffe/Nanduti, and Romanian Point Lace.  That is what is represented in the laces on my dresser and night stand.
The laces seen here starting from lower left to right are:  Tatting, Romanian Point Lace, Tatting, and then Nanduti. 
 
The tatted pieces were tatted by me.
 
This Romanian Point Lace piece was the first piece that I had ever collected/found.  I found it in an antique store in Riverside, CA while there to teach at a national needlework show.  It was filthy, a light brown color and covered in dust bunnies. I actually found it on the floor next to the dock door.  It was marked $10 (a price I was thrilled with!) but I took it to the clerk and told her where/how I had found it and that it was filthy.  She looked at it and quoted me a price of $2!!!!  I tried not to show too much eagerness in pulling out my money too fast!!!  I brought it home and soaked it overnight in Orvus detergent and the next day it was white and beautiful---quite the transformation.  This piece is not the most unique of this lace type , but it does hold a special place in my collection due to being my first and in how I obtained it.

Tuesday, June 10, 2014

What I have been working on

Just an update to fill you all in on what I've been working on


I have been working on getting tatting Book Number 3 ready to publish.  Of course it is SPLIT RING TATTING.  The title/topic is:  Block Alphabets in Split Ring Tatting.  It will feature 2 different alphabets with matching numbers as well as 'frames'  and ideas as to how to use the letters you create for decoration.  Right now I am sewing on letters and a frame I tatted to fabric base.  I will eventually frame it so that it mimics those filet crochet nameplates.  Hopefully soon I will have a photo of it to show/share.

The other things that I am working on/towards is to create some new and unique tatting shuttles.
This includes:
  • The ShuttleSmith Tatting Shuttle Endeavor Number 1 is Leather Tatting Shuttles. 
I've already debutted one form of my leather shuttles--those that are double layered.  This features bonding a colorful, decorative leather to a base layer of leather that is sturdy.  I have  several colors already made, plus I purchased a whole bunch more leather scrap pieces in some great colors to make more. 
Leather Tatting Shuttles as of 6/10/14


  • The ShuttleSmith Tatting Shuttle Endeavor Number 2 is Stone Tatting Shuttles
I have been apprenticing with a master lapidarist who has been teaching me about rocks and mineral specimens---it has been a fascinating journey thus far.  I had actually taken two separate lapidary classes in the past and know a little bit about the process and had actually even made a prototype stone tatting shuttle (though I can't find it today).  Bruce has been collecting mineral specimens and cutting/polishing rocks into jewelry pieces since he was a kid (check out his website: http://www.thefinestthings.com/).  The problem with learning from Bruce is that he has the best tools available....so I was apprehensive about his kind offer to learn on his tools, knowing that I would be not able to afford such wonderful machines.  Recently he 'hooked me up' with a local guy who was selling off some lapidary machine.  I went down and bought it but haven't had time to play with it.  It needs to be hooked up to a water source which is a bit difficult.  Plus, Bruce & I are busy with other aspects of our lives (eg. lawns, landscaping, home repairs, motorcycling--me) this time of year and haven't had alot of time to explore this hobby.
  • The ShuttleSmith Tatting Shuttle Endeavor number 3 is Copper Enameled Shuttles
This is what I am actively working on.  I took an introductory class and discovered how much fun it was.  We made jewelry but my thought was 'How can I make tatting shuttles!'.  I have had success with creating jewelry peices but as yet haven't finished a tatting shuttle YET.  By the end of the week, I should have a prototype.  I am actively checking my mail for a new torch that will be hot enough to heat the larger piece of copper that forms the shuttle.  BTW, 'enameling' is the process of fusing glass onto a base, in this case copper.  I have alot of color options to play with.  Hopefully I will soon have something to show you......


Website is fixed

Hello all,

Just an update that I FINALLY got around to asking my husband (a computer genius!--hopefully he will read this and continue to help me with my computer woes!) to look at my website issues.  You all were saying that you got a blank page.  So I tried out 3 different web browsers (Internet Explorer, Mozilla, and Google Chrome) to see what I got when I put in my website address.  On the latter two I got a blank screen.  On Internet Explorer, I had the option to go to another screen page that did let me in, and was how I was able to get content onto my webpage recently.  The husband-genius figured out that Google had changed how it handles things and thus he was able to figure out a fix. 

Sooooo....this all means that you can go to my website  www.TheShuttleSmith.com   and check out:
  • The latest Free Split Ring Tatting Pattern
  • 'Lace Handkerchief Origami'---a tutorial on how to fold a lace hanky so that all the lace will show.
Sincerely,
Karen Bovard
The ShuttleSmith
Omaha, Nebraska

Wednesday, June 4, 2014

Lace Handkerchief Origami


Lace Handkerchief Origami

I've been doing this for quite some time...but just recently decided to write up the directions as to how to do it. 

The directions are in a PDF file on my website:
www.TheShuttleSmith.com

Go to:  "Lace Handkerchief Origami" tab

Click on the pdf file at the bottom of the page.

There is even a pattern that you can print out to learn the technique on paper before attempting it with your precious lace hanky.

Thursday, May 15, 2014

Free Split Ring Tatting Pattern

I finally got around to packaging another Split Ring Tatting pattern for distribution.

This pattern is from my first book Fun with Split Ring Tatting.

Go to:  www.TheShuttleSmith.com

Click on "Free Split Ring Tatting Pattern"

Thursday, May 8, 2014

Another Way to USE Lace

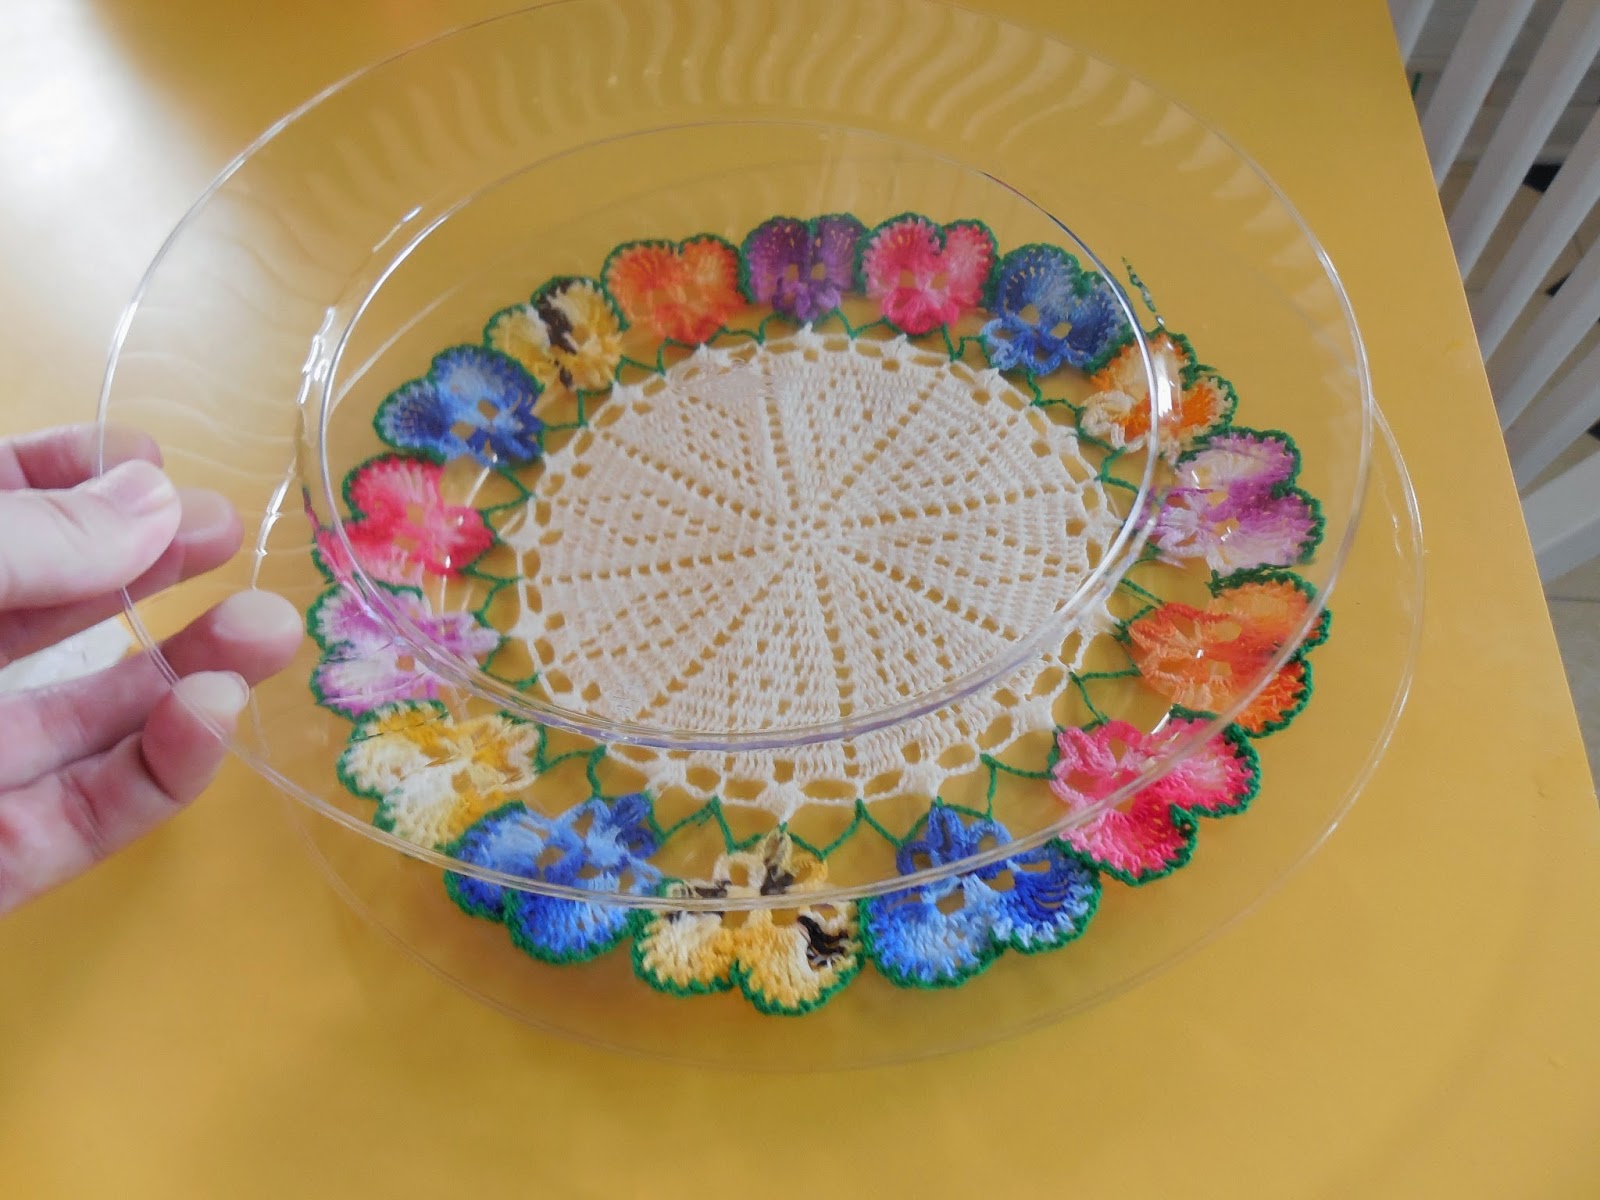
My friend Susan and I were hosting 'book club' a couple of days ago and in the preparation process, Susan showed me a box of crocheted doilies that she had found while cleaning out her parent-in-laws house.  As we were looking through them, I tried to instill a sense of appreciation in her for what she had.  So I grabbed one of the doilies and showed her how to wet it, and block it out on the countertop so that it would look better.  However, the time came when we had to go on with our hostess prep and the doilies had to go away.  So I was looking for a way for Susan to take the (still wet) doily with her and in the process grabbed one of the clear, plastic plates that we had out to use for our party.  It fit perfectly.  Then we got the idea to put another plate on top of the bottom one and the doily....and we realized that we had just created a LACE PLATE!!!!  So we decided to use it for our goodies. 


At the end of the evening, Susan insisted that I keep this doily.  She promised me that she would love and appreciate the rest of the doilies in the box!!!

Susan using the LACE PLATE


Thursday, May 1, 2014

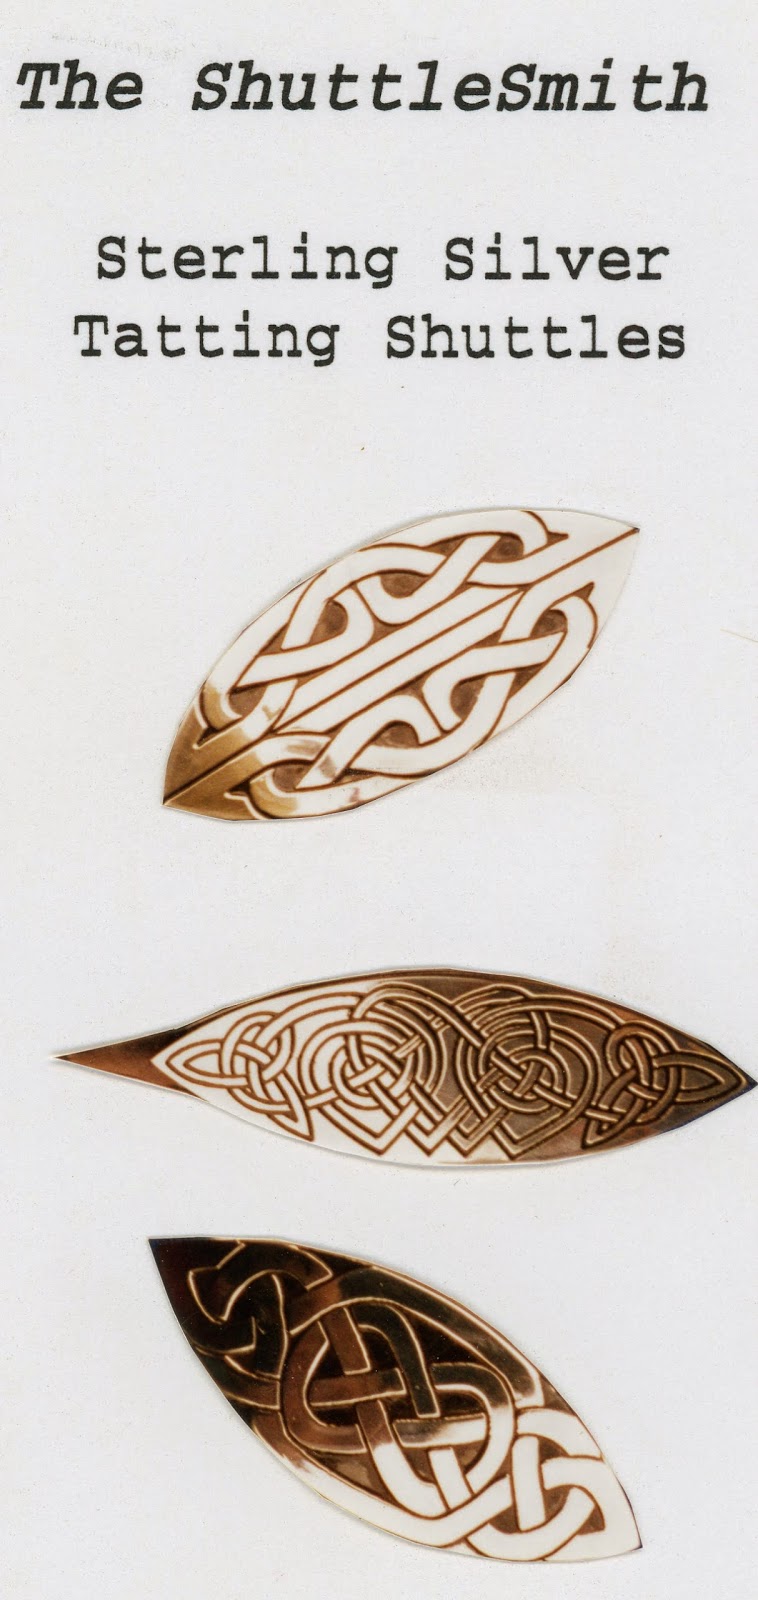
Another Blast from the Past--Silver Shuttles 2


These 3 designs were my
biggest sellers.
I was cleaning through some old stuff the other day and came across a folder of my original artwork for The ShuttleSmith Sterling Silver Tatting Shuttle brochure.  I sold these things when the WWW was in its infancy.  So I made and sent out a brochure.  The picture is from my front cover.  I can't tell you how much time I spent trying to get good film-based photos of my sterling silver shuttles!!!!  Again I'm aging myself because this was before digital photography was commercially viable.  The problem was getting photos of something so shiny without getting yourself or some other reflection in the image.  Actually, come to think of it, I used to do alot of my photography in the medical center's (where I worked) morgue/autopsy suite.  They had a photography stand set up and I would bring my special light bulbs (after hours, of course) to get the right color of lighting.  I would set up the shots, shut out the overhead lights, and then run back (in the dark, in a morgue!-YIKES) to take the shot.  This was to keep the time down on my special lightbulbs (that were expensive and not long-lived).