Sunday, March 29, 2015
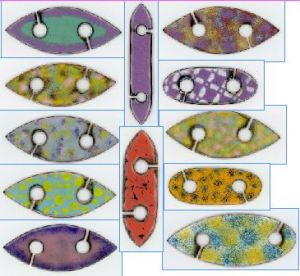
New 'Spring' Glass-Enameled Copper Tatting Shuttles.
I have just added 12 new glass-enameled/copper tatting shuttles to my website specially chosen for their SPRING-LIKE color combinations.
They are available for adoption from my home page www.TheShuttleSmith.com: Click on 'Tatting Shuttles', then 'Copper/Enameled Glass Tatting Shuttles'.
Check out the color descriptions and close-up views of the shuttles (front and back).
Payment is via PayPal.
Free shipping to USA addresses.
Prices: $20 to $25
Wednesday, March 18, 2015
Another ‘FOUND’ Tatting Item–Tatting ideas
I have sooooooo much tatting stuff in my studio that I have done through the 20+ years I have been active in tatting, a local tatting club and teaching nationally. Here are another items that I ‘found’ while cleaning/searching for something else.
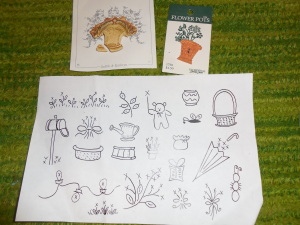
The bottom item is a bunch of doodles I made that could be used on notecards, with tatted rings/bits added to. I compiled these doodles to give (myself) ideas as to how I could quickly use my left-over tatted rings for fun projects (you know: the rings you make from the leftover thread on a shuttle to ‘clean’ it out). Keep in mind that I do not consider myself an artist, thus these little drawings were references for me to use for that purpose. It actually started with my local tatting club (The ShuttleBugs of Omaha)….whenever we used to to demos at events, one of the members had notecards stamped with little designs similar to the ones in the picture. Club members donated to the cause tatted rings (using up leftover thread from our shuttles). We allowed the public to choose rings and glue them onto the notecards. Everyone just loved it!!!!! Maybe we didn’t get any new tatters from the process, but we did share the beauty & appreciation of tatting.
The 2 items at the top of the picture are ceramic/resin buttons that resemble vases that I bought sometime in the past. I thought that I could use them to add my tatted ‘flowers’ and create something. (I never did use them and thus they ended up in my drawer, one of them broken along the way).
I should scan in the drawings and share them on my website. I shall have to put it on my ‘to do’ list. Keep in mind my ‘to do’ list is quite long—if you are interested, send me a note (either here as a comment or email me at k.bovard@yahoo.com) and that could spur me to bump it towards the top of the list.
Thursday, March 12, 2015
Found items while searching for something else
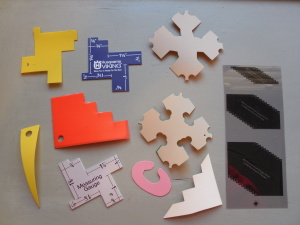
picot gauges. In addition there are two homemade (by me) thread winders. I don’t remember what the ‘C-shaped’ apparatus is for, even though I made it!!!
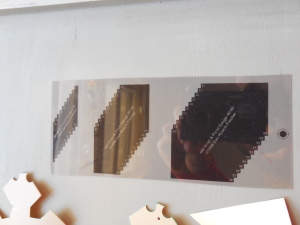
This item is a set of 3 picot gauges created and sold by Daniel Rusch Fisher (quite a long time ago). They consist of a sheet of clear, fairly thin plastic with the gauges printed on the plastic in various sizes. To use them, one would have to carefully cut out each piece along each picot size step.
The reason all these items were in my drawer all these years is that I do NOT use picot gauges. For some strange reason at some point I decided to buy and make these ‘just for grins’.
This weekend, on my list of things ‘to do’, was the task of creating my 2014 business accounting ledger for income tax filing purposes. My MO is to put all receipts into a folder and then in the new year, try to make sense of the receipts and create an appropriate business account. Somehow along the way, I decided to put the ‘2014 reciept folder’ in a SAFE place (ie. hidden somewhere stupid) and that was why I spent a large amount of time looking for the folder on Sunday. Along the way I found a very messy drawer of my tatting/lacemaking treasures and started to clean an in the process I found these items in the picture. They constitute my collection of handmade and purchased This item is a set of 3 picot gauges created and sold by Daniel Rusch Fisher (quite a long time ago). They consist of a sheet of clear, fairly thin plastic with the gauges printed on the plastic in various sizes. To use them, one would have to carefully cut out each piece along each picot size step.
The reason all these items were in my drawer all these years is that I do NOT use picot gauges. For some strange reason at some point I decided to buy and make these ‘just for grins’.
Monday, March 2, 2015
2015 IOLI Convention Class–Pearl Tatting–part 2
Please consider joining me at the IOLI Convention in Iowa City, Iowa this coming summer.
This is the second post about the class I will be teaching entitled PEARL TATTING.
In addition to learning about the basic of pearl tatting (both rings & chain) and other decorative stitch combination you will learn a totally new form of tatting technique originated by by me that I call “Layered Pearl Tatting”.
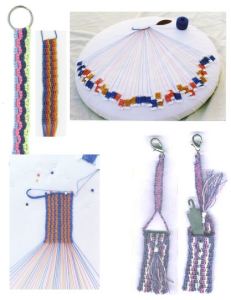
The second half of class time we will focus on the “Grand Project” in which we will bring many of the Pearl Tatting Techniques together to create a multiple thread-source pouch. Students will have the choice as to how much of a challenge in tatting they want to tackle.
I understand that there has been alot of interest in this multi-shuttle/thread source pouch. This is your chance to learn it using a 'whole bunch of' tatting techiniques.
I love advanced tatting techniques, and this class is truly innovative!
Subscribe to:
Posts (Atom)
My Blog List
-
-
The Single Stitch According to Riego12 years ago